Wednesday, April 20, 2022

How does my garden grow?

Our new plants are growing! And flowering too!!

Now if I can just not kill them. Knowing when to water is challenging. We got a couple of good rains since planting in the planting bed. But this week the weather is not cooperating. I was hoping we would go on getting a good solid rain once a week. I heard a storm was expected yesterday, but we only got a few drops. 

So I just went and watered the plants a little and gave the maple its weekly deep watering.

I also took some photos. It is a little windy so I wasn't able to get good close ups of the flowers:


Yesterday I also noticed that the maple is leafing out. Here is a close up of some of the new leaves. 


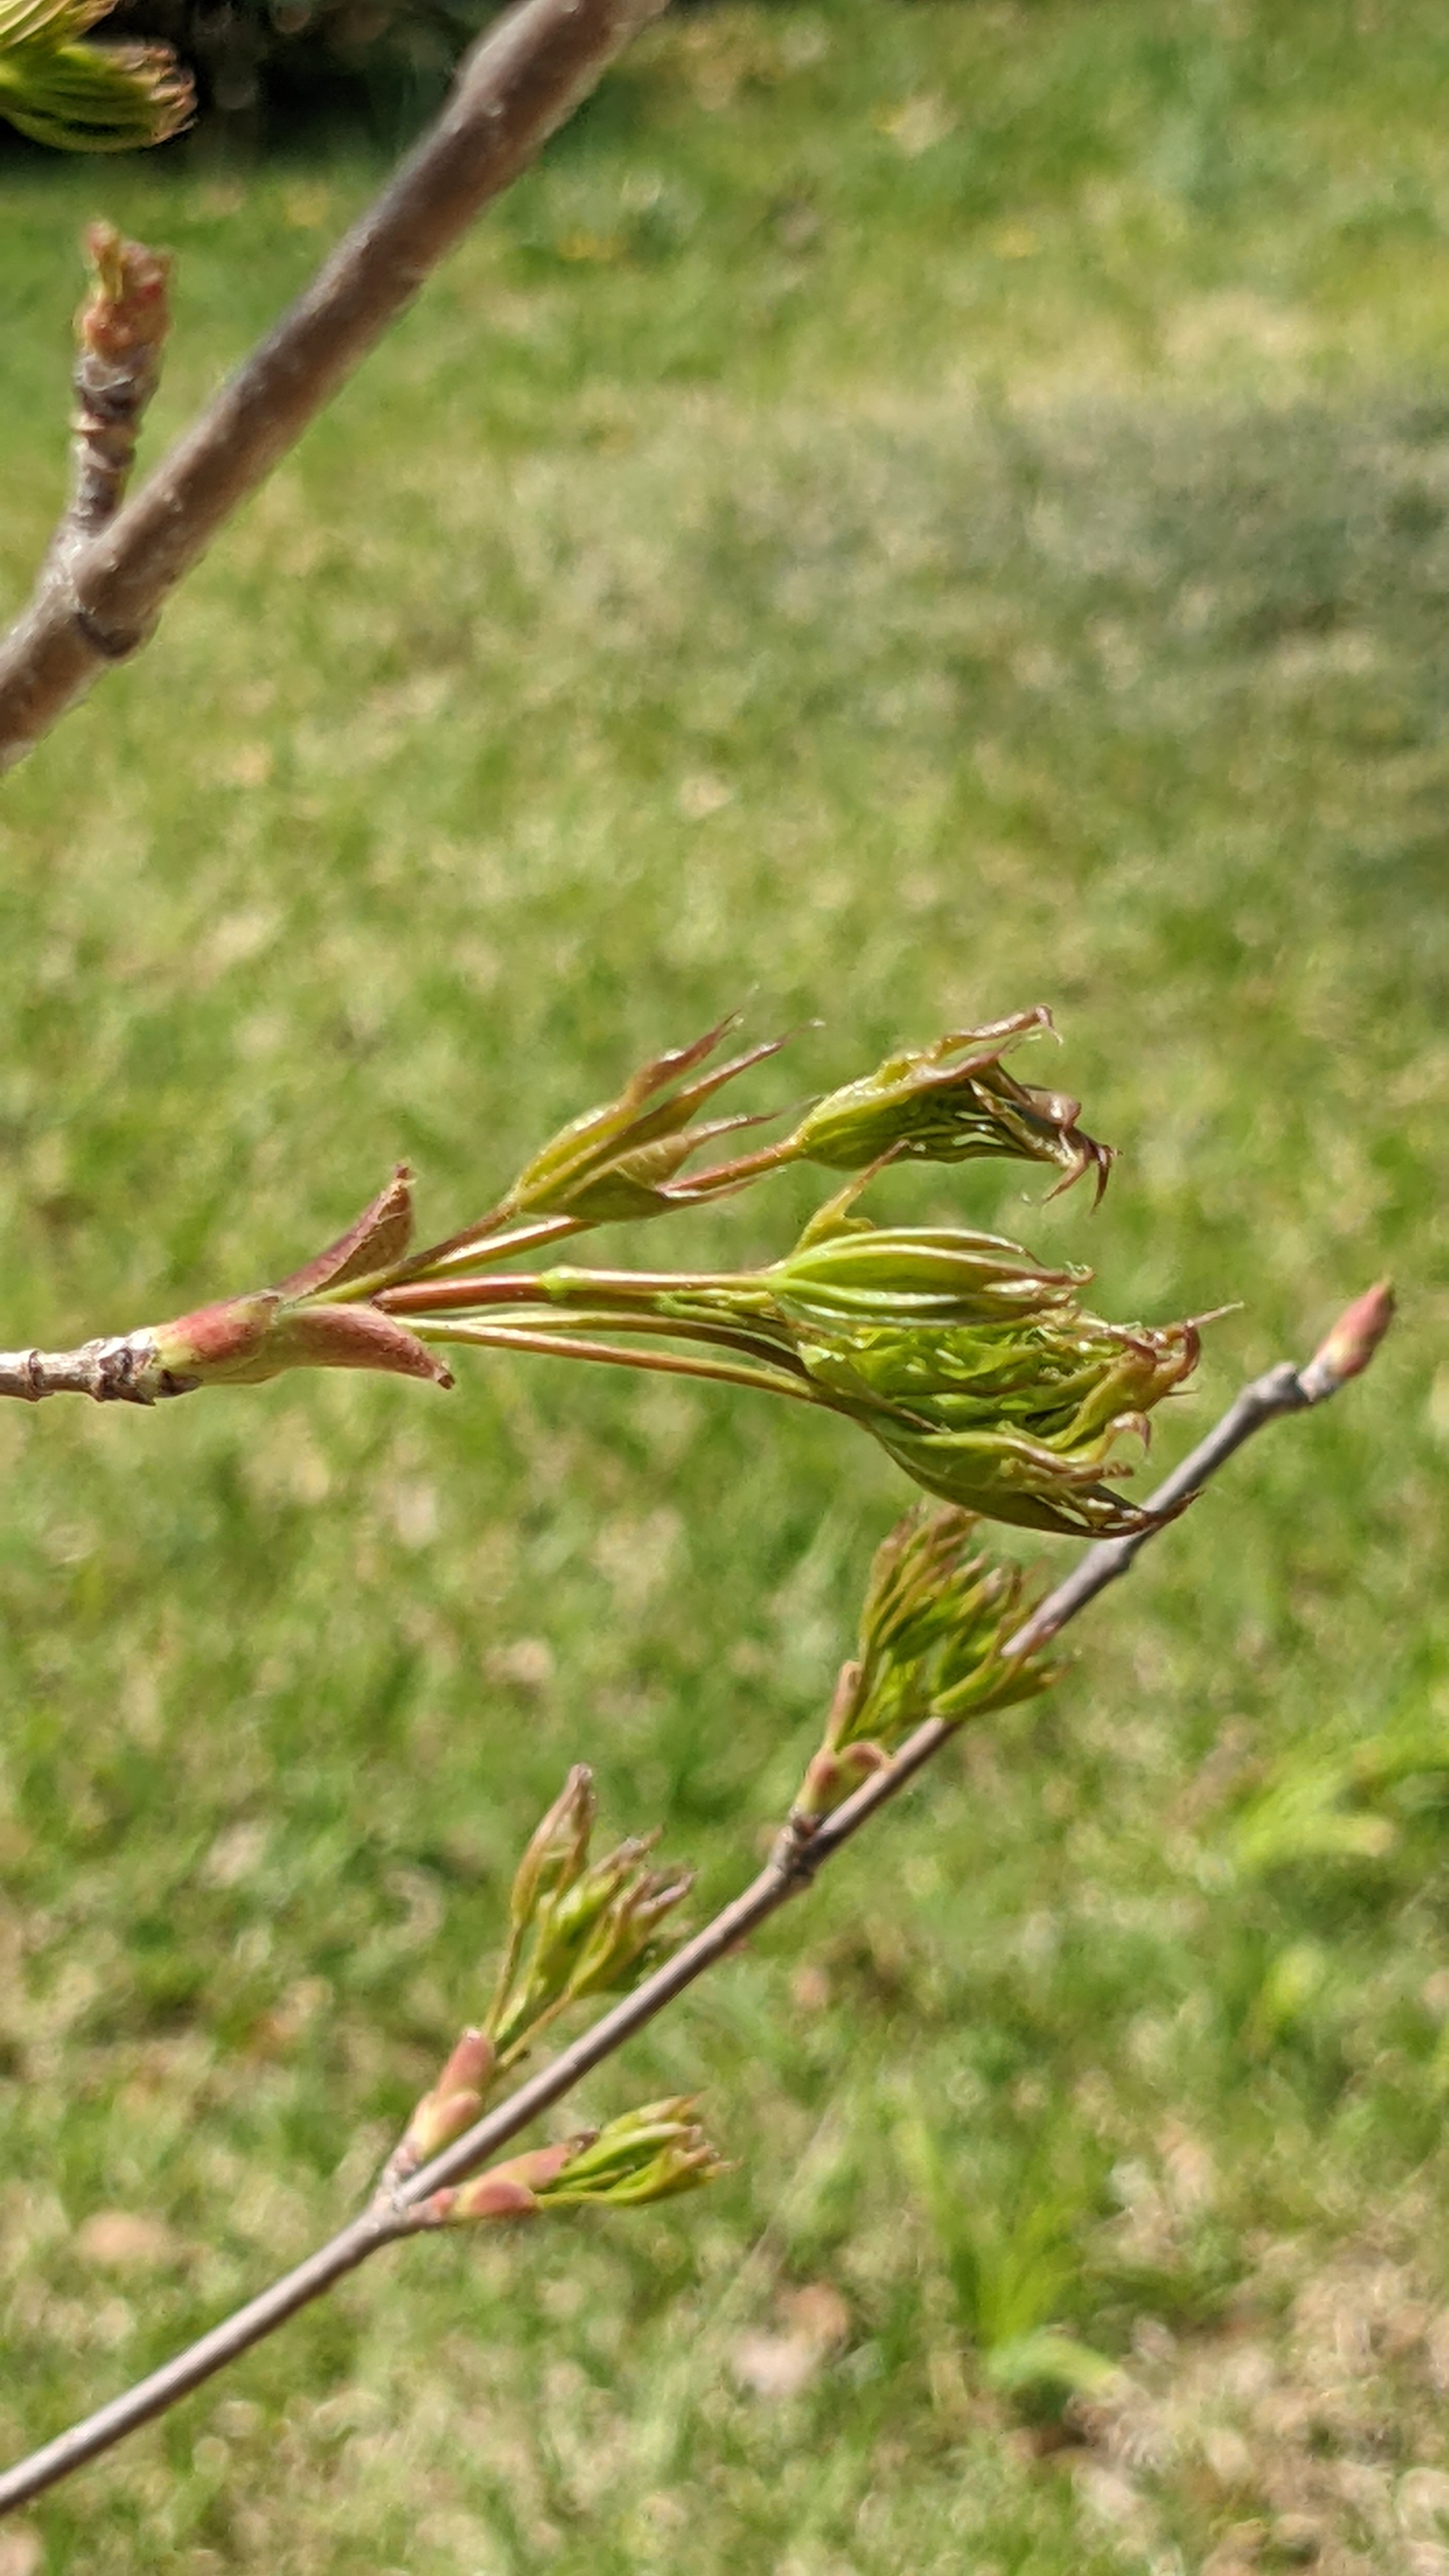
It is still so tiny that it doesn't show up very well in photos as a whole tree. But here is one from my office window this morning:


The next morning: 

We had a lot of rain this morning since I wrote the above (my rain gauge said 3/4"). So now the maple has had two deep watering's. Oh dear. At least I only gave the planting bed a little sip yesterday so the big drink it got this morning should be ok. Meanwhile the maple is due for it's monthly "Seamist Root Stimulator" treatment. It is a liquid concentrate that I am supposed to dilute in a gallon of water. So that means more water... But one gallon isn't really very much... is it?

Several days later:

I haven't seen any butterflies around the garden yet. The main wildlife we get are squirrels and neighborhood cats.

He seems to be surveying his domain.
It's better than some things he could be doing!


Other news is that we got a new roof. We weren't planning to and didn't even know it was needed until last week. That's what the sign in the yard is about. I'll try to post about it next time. I was going to do that with this post but it was taking too long so I decided to finish this to let you know how things are growing while it is still fresh and exciting! The irises are about to bloom too. So next time I'll try to include some of those.

Here are some better photos of the flowers: 
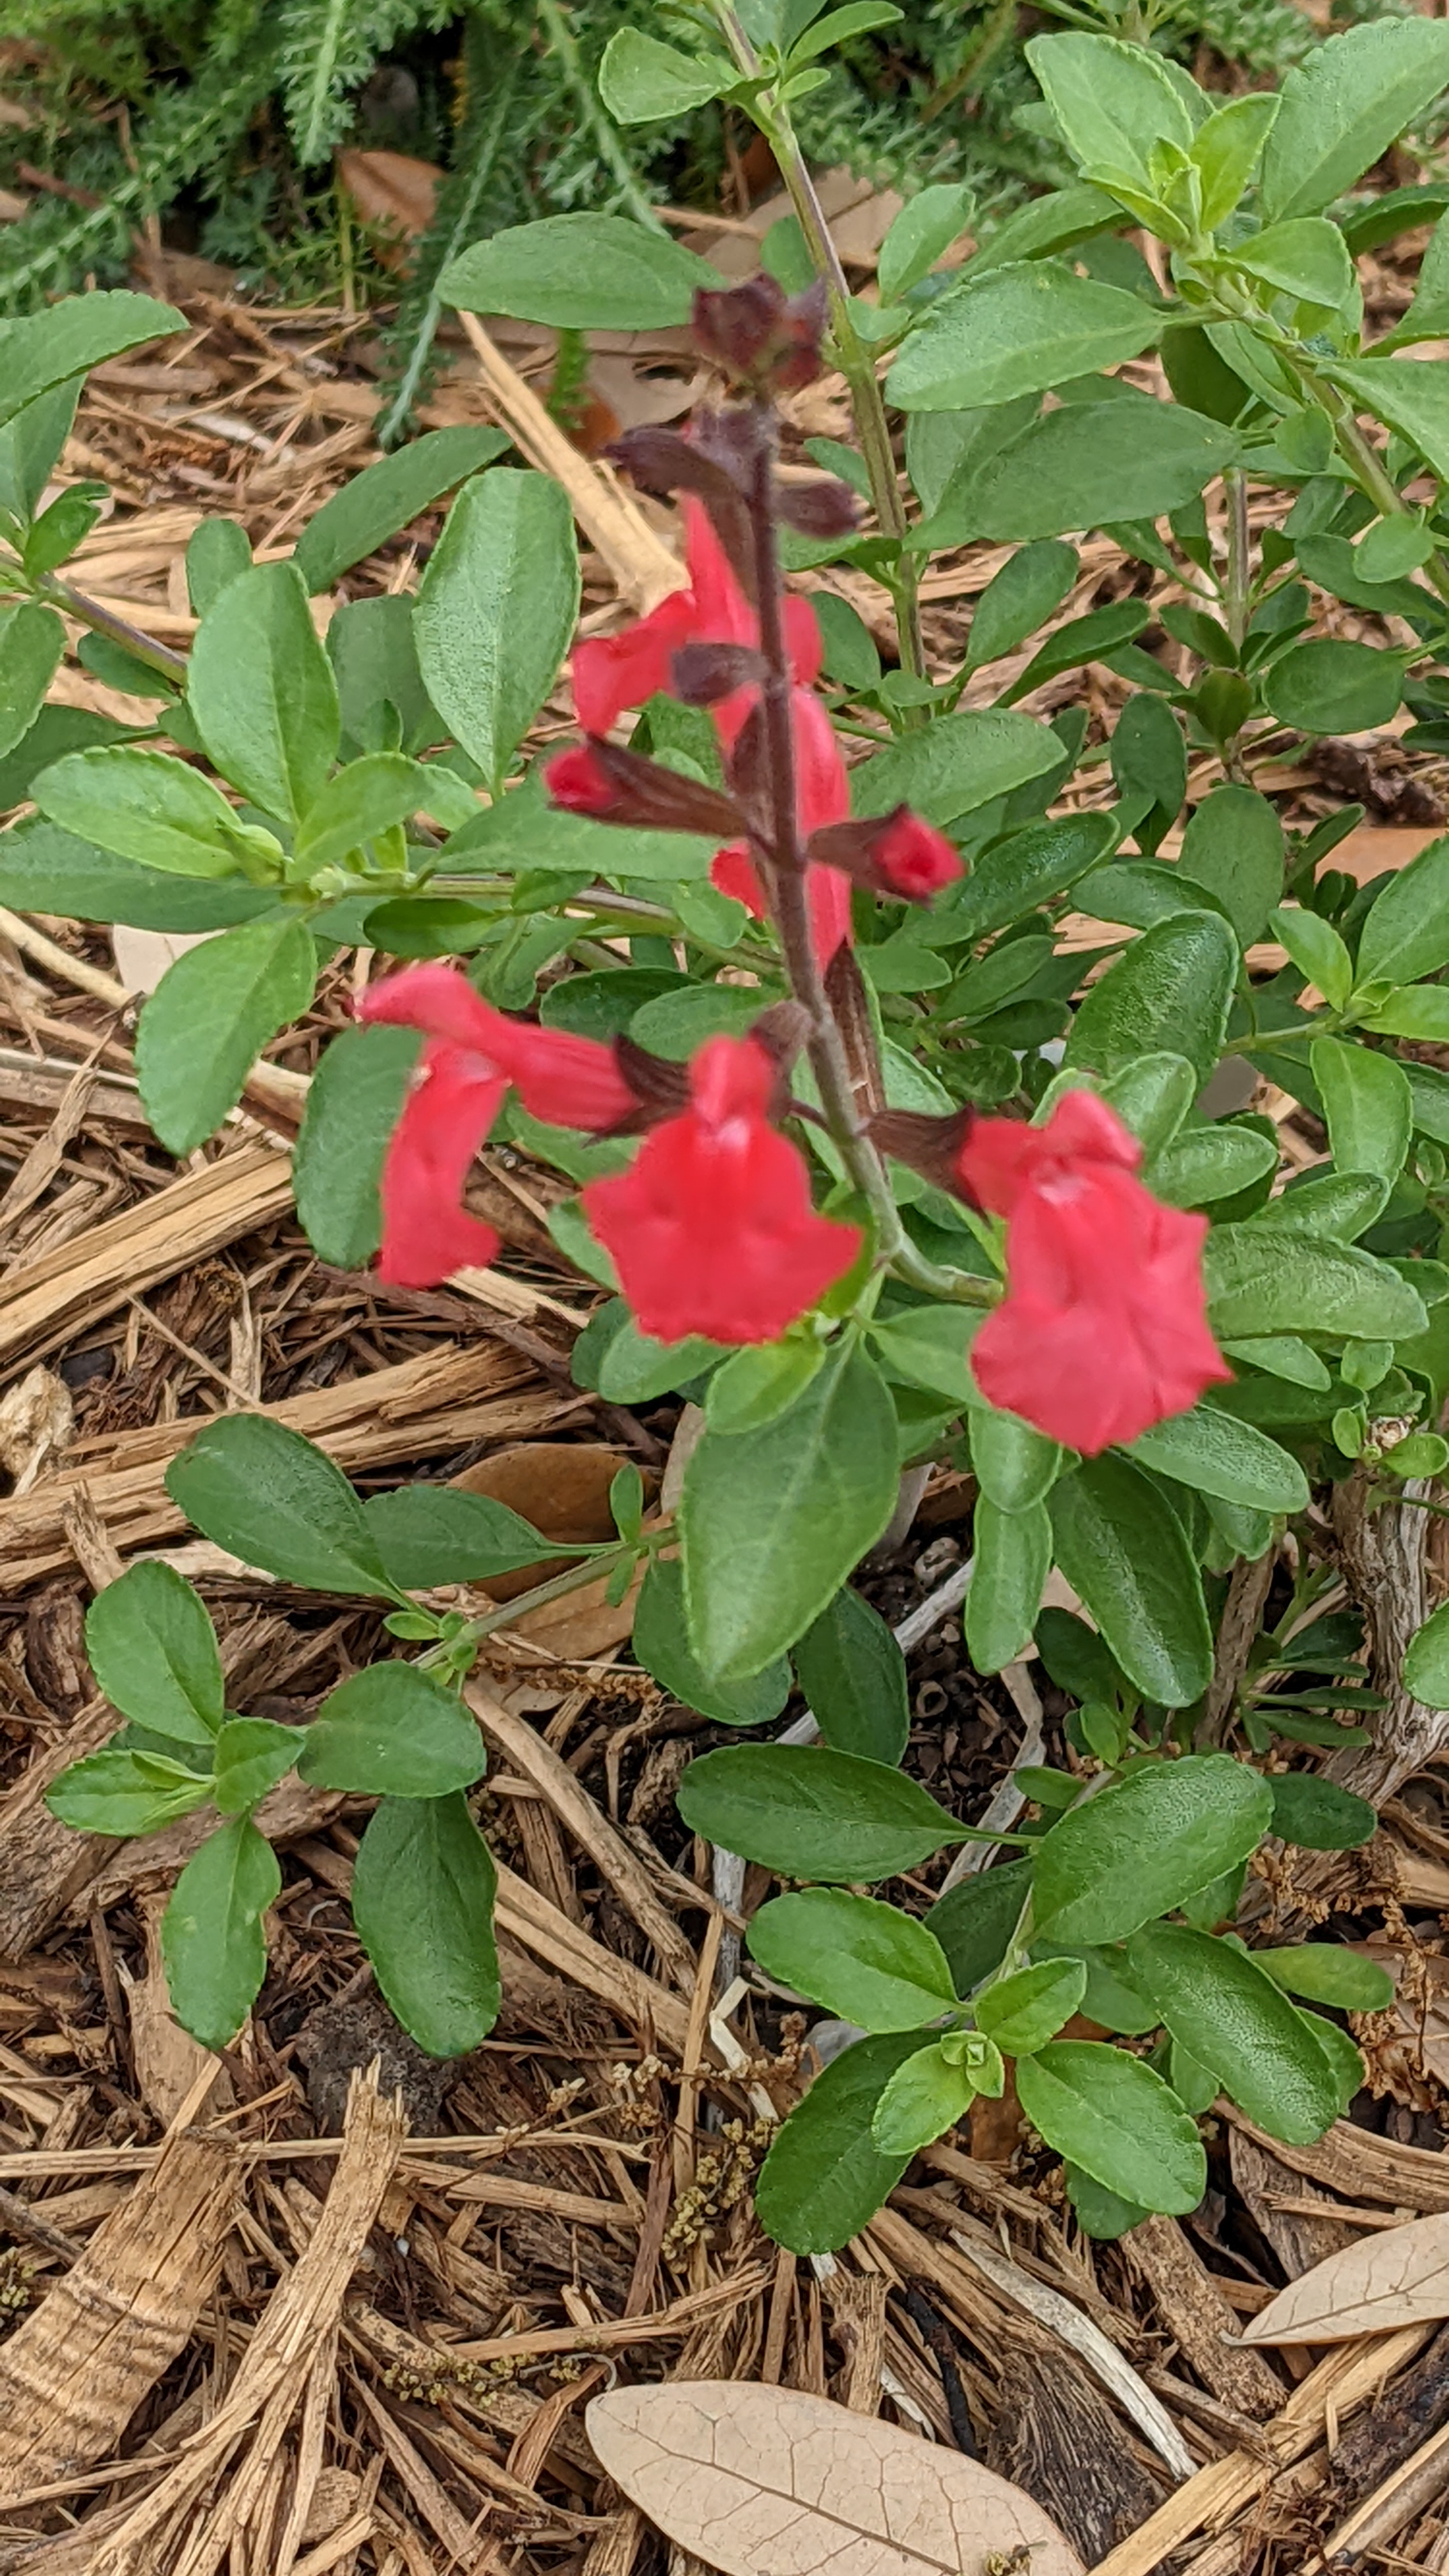
Salvia Greggii


Gulf Coast Penstemon

Thursday, April 7, 2022

Planting in the planting bed

The plants are in! We finally planted in our new planting bed. 

I use the term "we" somewhat loosely. I sprained my ankle a few days before, so my main contribution was supervising from a lounge chair. John and Roger, a coworker from John's office, did most of the work. 

It was a mild sprain so I did sometimes get up to get things for them (and to take a few photos!). That is until the sun and heat were too much for me. Then I went inside. This spring seems like winter and summer are fighting it out to see which will win. One day winter is on top and the next it feels like summer is winning. 

It was a big job. It would have been a much bigger job without Roger's help. So in case you read this, Roger, thanks again!

We started gathering plants several days before. All but the desert willow came from Val's nursery, Motherherbs Garden, in Cedar Hill. 

We got the desert willow a week before
from Weston Gardens, in Fort Worth. It was a lovely spring day.

A few days later on Tuesday afternoon we got the other plants from Val's nursery. It was so cold that day I didn't think of taking photos while we were there. It felt like winter was back for sure. I was seriously tempted to just hide in her green house where it was warm and let Val and John collect the plants. This photo is when we were unloading them at home onto our patio.


The first job was to dig a hole for the desert willow and do a perk test. John did it the night before planting. It took about two and half hours to drain. Val said anything over two hours is considered poor drainage. It means we won't need to water as often though, so that at least, seems like a plus. 


Hole for perk test

Saturday morning he removed the mulch from the bed temporarily and put it in bags to reapply after the plants were in.

Then he took separate photos of each kind of plant together in their pots with the label showing so we would have a record of what's what. I'll try to do another post soon with a close up of each kind of plant and tell what they are.


Then he put everything in place according to Val's design (below). 


The checkerboard is where the dead stump from the old ash tree is. It is a few inches below the surface. We had the stump ground down when the tree was removed. But it only went several inches down. John removed what he could of the smaller roots around it when he was building the bed, but this part was too massive to remove. He inserted molasses into it (see previous post) so hopefully that will help it break down. The bigger black square is where Val suggested we could put a bird bath or something. But now that we have planted everything it doesn't look like there is room for it there after all.

John and Roger planted the desert willow first (that is the W in the diagram above).


Roger planting native yarrow around the desert willow. (After planting I pruned the desert willow per Val's instructions by removing the bottom two branches and a little of each of the top branches as well.)


Val said to water the plants just before planting them. He watered the planting bed the night before.


All done but the mulch


John and Roger taking a celebratory drink of water :-) after a job well done. 


John putting the mulch on.


It's been twelve days since we finished planting. I feel happy with the way it looks and I look forward to seeing how the plants grow and flower. 


The desert willow after removing the bottom two branches and pruning some off the top branches: 

It's the taller twiggy thing. The shadows are from our neighbor's oak tree. It gets a brief period of shade in the morning. Most of the day it's in full sun. 


View from my office window.


Wednesday, March 30, 2022

Landscaping - Installing the Sitting area

As I mentioned in my last post, the next step after making the planting bed was creating the sitting area.

We covered the area with decomposed granite (DG for short). It is cheaper than concrete and allows rain to percolate through so it is better for the soil. It is supposed to pack down and solidify. That is still a work in progress. But I am getting ahead of myself.

To prep the ground for the DG, John cut the grass down almost to the dirt. Here he is using the weed eater on it. He also removed some of the dirt where the ground was too high.

 I realized after I posted last time that I neglected to put a picture of the finished planting bed. So you can see that here too.


After cutting the grass down he checked for low or high places and added and/or removed dirt as needed.  


There used to be a strip of white rock next to the house. I didn't want that there anymore so he removed it. That's why there's no grass along there. The large black pipe in the trench next to the house connects our drip irrigation system on the side of the house with the faucet at the front. If you look closely you can also see a small brown tube laying next to the black pipe. That's an irrigation tube to water the foundation. 

It may sound crazy but "watering the foundation" is a thing here. It is actually watering the soil around the foundation to keep it evenly moist. The soil in this area is a type of clay that expands and contracts easily with changes in moisture levels. Our weather varies a lot from drought to floods, and freezing to heat. The frequent changes in the soil puts stress on foundations here and can even make them crack. So watering the soil around the foundation helps keep it and the foundation from cracking. 

The grooves in the grass on the right side of the photo are where there were irrigation tubes to water the grass. Those aren't needed for the sitting area so John removed them. Val, our landscape designer, said not to put any on the planting bed either since the plants she chose for that are drought tolerant and won't appreciate regular watering. We generally only water the grass once a week but she said they wouldn't tolerate even that much. 

Once the ground was smooth and level, accept for a slight slope away from the house, he covered it with heavy duty weed barrier cloth. 


The wind didn't help, but it makes for a more interesting photo.

It was nearly dark and the streetlight beside our house was already on by the time it was done and ready for the the DG.

The DG on the right in the photo below is the one that is most common in our area and was what Val recommended. But we discovered the large kind, on the left, at Earthtones Greenery in Midlothian, about 30 minutes from us. We thought it would be less likely to track into the house on our shoes so we got it instead. They had large a sitting area of it at Earthtones. It looked quite nice and was well packed down and solid. They said we would need three inches of it which was more than what Val had said we would need of the other kind. But that seemed reasonable and it made it more even with our front entry way.


We were thrilled to learn that Earthtones offered delivery--saving us multiple trips with our little car and lots of loading and unloading. We were also able to borrow a wheelbarrow from a coworker of John's. 


They Earthtones Greenery delivery man dumped the DG onto a tarp we put out on the curb in our front yard. 


John dumping the first load of DG onto the prepared sitting area.


The n95 mask was great protection against the DG dust. It didn't look like it was generating much dust but after helping John for a few minutes I could feel it lodging in my sinuses so I put one on and insisted John use one too. 

Spreading DG with the back of a rake.


Starting the seemingly endless process of packing and leveling. The hand tool John is using here doesn't seem too heavy the first few times you pick it up and drop it but after the first several hundred, or so, times I suspect the weight starts to add up!


Watering DG is supposed to help it solidify. We'll see. So far it is still fairly loose. Hopefully my friend Susan is right and it will pack down more as the weather warms up. It keeps getting churned up though and we have to keep releveling it. I hope it doesn't suddenly decide to solidify on a day while it is churned up before we've gotten around to re-leveling it again. 


The finished sitting area. 


So that is the the sitting area installed. We hope to add more color to it and other things--like things to sit on for example. But that will come later. Next up: plants in the planting bed! 


Monday, March 14, 2022

Landscaping -- the large Planting bed

If you've been following our landscaping saga, you know that last year we had to remove our two big ash trees out front that were killed by a severe winter storm in February. Since then we have been working to install new landscaping. The first stage was to plant a new shade tree on the left side of the yard ("left" when looking from the street). Now we are working on stage 2--the large-ish planting bed on the right side.  

John finished building the planting bed in January. But we have been waiting for more propitious weather to plant things in it. Val, our landscape designer, said we could plant in January and just cover things in case of frost. But I wanted to hold off until Spring. I don’t know if I was right but we have had two winter storms with snow and ice since then so I’m glad we waited. Also John was having carpal tunnel problems from all the digging he's been doing and I have chronic health problems that cause fatigue. So I wanted to take advantage of the winter to take a break from major gardening and give ourselves a rest. Isn't rest and hibernation part of what winter is about? 

But now it is half way into March so our hiatus is just about up. I should say mine is, John started digging on another gardening project in the back a few weeks ago. That's another story, though. 

So on to our current story -- building the planting bed:

The first step, in December, was to stake out the area. You probably can't see it but, there is string strung between each stake. The brown patch is part of where the ash tree was that we had removed last year. (John transplanted grass on the area outside of the planting bed area some time before I took this photo.)


He marked the area with blue marking paint and removed he stakes and string. Then he removed the grass from inside the area and transplanted it to the other side of the yard to where the other ash tree used to be on that side. 

This is the area on the other side. The transplanted grass is in small plugs spaced over the area.
It is a larger area to fill in because we had liriope growing around that tree. John has valiantly dug it up since the tree was removed. I'm sorry if you like liriope, but I don't want a large pointless patch of it in the middle of the grass. (It's a long story why we didn't have it around both trees. I'm very glad now we did not! It's invasive and hard to get rid of!)


Then he dug up several inches of dirt and saved it in bags to mix with compost to then add back to the planting bed.


A major part of the job was dealing with the roots from the dead ash tree.


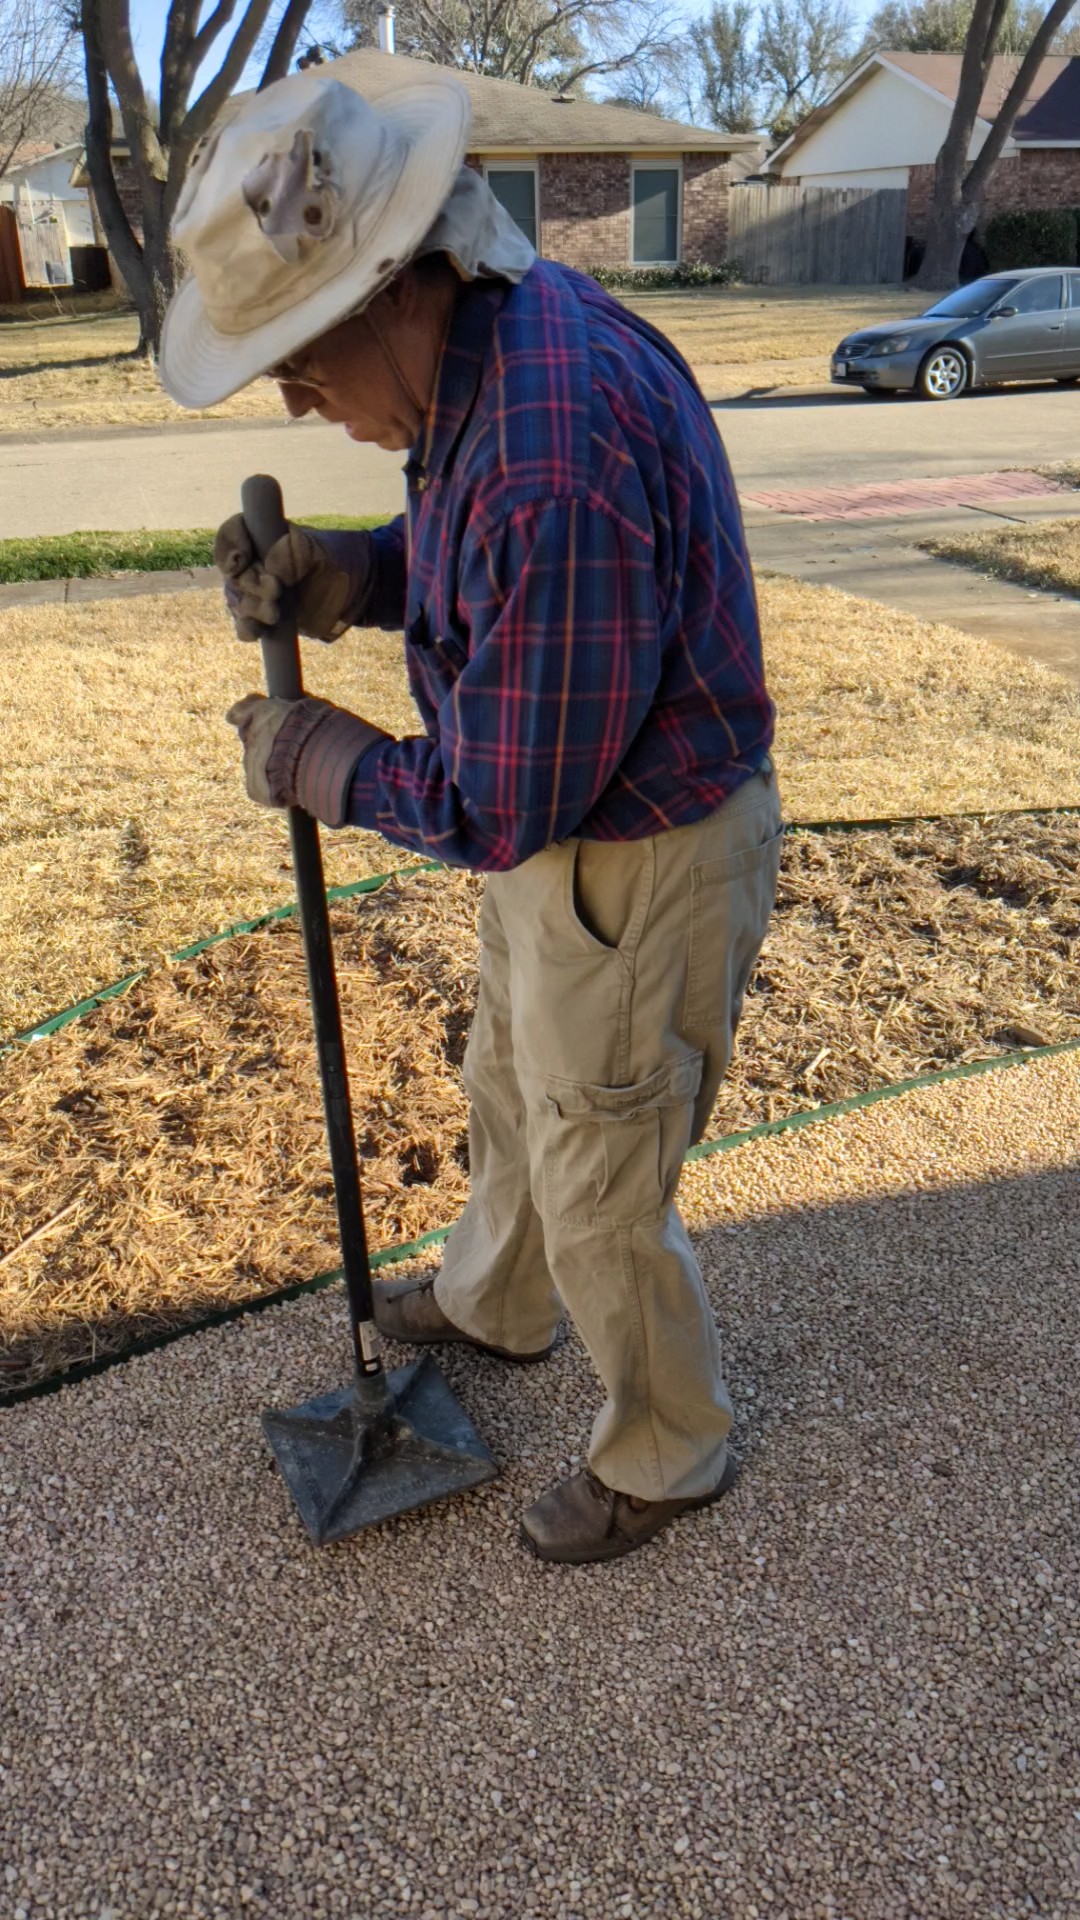
Some roots he dug out, some he sawed out with a saws-all and some he chopped out with an ax


The pile of roots he dug, chopped or otherwise cut out.


And some are too big to remove. Val told him to drill holes in them and squirt molasses into the holes. The molasses is supposed to encourage the microbes that will eat the dead roots. 


John drilling holes in the big tree roots he couldn't remove. He then used my turkey baster to inject gardening molasses into the holes.


Next he installed edging.


Then he dug up another layer of the soil and mixed it with compost (and maybe something else but I don't remember). And then he put it all back into the bed and leveled it as he went. 

The final step was to cover it with mulch to protect the soil from drying out.

He then installed the sitting area. But I'll save that for another post.

Next I need to contact Val and arrange to get the plants she has for us. We also need to find a desert willow which will be the focal point of the planting bed.

I have wrestled with how much to research and re-think her choices. But I decided to stop tying myself in knots over it all and just go with what she suggests.  I hired her because she is an expert that was recommended to me by someone I trust. Not to say she is perfect or that we can't disagree with her at all. We have made a few minor changes as we have gone along. But I just don't have time and energy for constantly second guessing and worrying about everything all the time.

So anyway, I need to arrange a time to get the plants soon and then we can plant!  


Thursday, February 17, 2022

Part 4 Vacation 2021 Highlights - Cedar Hill State Park

For our third and final week of vacation we drove almost all the way home and camped at nearby Cedar Hill State Park. We've camped there several times but always find fun things to do and see.  

We were in loop H in site 127. It is a lake view site with full hookups. We were delighted to find the site across from us had a trail down to the water and a beach we could launch the canoe from. Better still the site was empty and a neighboring camper said that the site is no longer used so we had access the whole time. 

Being close to home we were able to have friends come and visit Sunday afternoon. They brought their kids and the dad and John and the kids canoed and played while the mom and I visited in the RV. Later I joined them while the mom took a nap. 


Another highlight was hiking on Tuesday. It was a cloudy day and being Fall there were not many flowers but there were still interesting things to see.


There were lots of fungi. As you can tell by the next several photos, I really like fungi.


And still more fungi!

This photo didn't turn out as clear as I wanted. But it looks pretty anyway--sort of impressionistic.

I don't know what, if anything, was living in this tree but I thought the shape of the bark was interesting. (it's not a fungi as far as I can tell)

We also went shopping and voted (another advantage of being near home) and got a few things from home and called my brother for his birthday. 

John suggested we go home a few days early because the weather was expected to turn off rainy and cold for the rest of the week. He said since we couldn't go canoeing or hiking anymore, we might as well finish our vacation at home--sort of a mini "stay-cation." 

But after thinking about it I said "no". If we stayed, we really would still be on vacation. The cold weather just meant I could stay inside and rest and read without guilt. (Isn't that what vacations are for?) But if we left early, I thought, our cozy cocoon would be broken up and we would be thrown into the hyperdrive of unpacking and getting settled again. Resting and reading would be out the window, at least for a few days, but by then our vacation would be over.

So, we stayed and it was cozy and fun. Friday, our last day was sunny and starting to warm up a little. It was a lovely day to break up camp and head for home.